Quickstart
In this quickstart guide, we'll teach you all the fundamentals of our Solana SDK, including:
- Deploying a new program from a script
- Creating a web application to interact with the program
By the end, you'll create a new NFT Drop program and a simple minting app for it!
Follow our Getting Started with Solana guide to create a wallet and get test funds!
Creating an NFT Drop Program
We'll start by creating a new NFT Drop program with the Solana SDK.
If you're starting from scratch, first create a new Node.js project:
npm init -y
Install the SDK with the following command:
- npm
- Yarn
npm install @thirdweb-dev/sdk
yarn add @thirdweb-dev/sdk
Now we're ready to deploy a new NFT Drop program and lazy mint some NFTs.
To do this, we'll first initialize the SDK with our private key so we can send transactions to the blockchain.
Ensure you store and access your private key securely.
Learn how to securely store your private key using a secret manager.
If you are unsure how to securely store and access your private key, please do not proceed.
Create a file called index.mjs, and create an instance of the SDK:
import { ThirdwebSDK } from "@thirdweb-dev/sdk/solana";

// You can get this private key from your wallet, but it's important to store it securely
const privateKey = "...";
// Here we choose to setup the SDK on the Solana devnet network
const sdk = ThirdwebSDK.fromPrivateKey("devnet", privateKey);
Deploying a Program
Now that we have our SDK setup, we can deploy a new NFT Drop program with a single line of code as follows:
const address = await sdk.deployer.createNftDrop({
  name: "Cool Drop",
  description: "This is my first NFT Drop on Solana!",
  totalSupply: 10, // the total amount of NFTs that will be available through this drop
});
// This will log out the address of our newly minted NFT Drop
console.log(address);
If you run the above code, it should log out the address of our newly deployed NFT Drop:
node index.mjs
# Prints out the address of the newly deployed NFT Drop!
Interacting with the Program
Now that we've created a new NFT Drop program, we can interact with it using the SDK.
For example, we can lazy mint some NFTs to our drop so they're ready to be claimed/minted by other people!
Let's create another file called lazyMint.mjs and lazy mint 10 NFTs to our drop, by:
- Initializing the SDK
- Connecting to the program using it's address (which we got from the previous step)
- Lazy minting the NFTs
import { ThirdwebSDK } from "@thirdweb-dev/sdk/solana";
import { readFileSync } from "fs";

// Initialize the SDK
const privateKey = "...";
const sdk = ThirdwebSDK.fromPrivateKey("devnet", privateKey);

// Use the address of the NFT Drop program we just deployed to connect to the program
const programAddress = "...";
const program = await sdk.getNFTDrop(programAddress);

// Here we create the metadata for our NFTs
// Images can be URLs or relative paths to files
const metadatas = [
  {
    name: "NFT #1",
    description: "My first NFT!",
    image: readFileSync("./blue_square.png"),
  },
  {
    name: "NFT #2",
    description: "My second NFT!",
    image: readFileSync("./yellow_star.png"),
  },
];

// And now we can lazy mint with the metadata
await program.lazyMint(metadatas);

// Now let's view all of the NFTs in our drop:
const nfts = await program.getAll();
console.log(nfts);
To be able to claim NFTs from the drop, you must lazy mint the same amount of NFTs as the itemsAvailable you set when deploying the program.
If we run the above code, it should log out the addresses of the newly minted NFTs:
node lazyMint.mjs
Let's see how we can build an application on top of this program!
Building a Claiming Frontend
We can use the CLI to create a new React application with ready-to-go Solana support using the following command:
npx thirdweb create app --solana --ts
This will create a new project for us, which we can open up and setup for our drop.
The first thing we'll have to do is configure the project to work on Solana devnet, since we deployed our contract there.
We can do this by navigating to the pages/_app.tsx file where we can change the network to devnet as follows:
import { WalletModalProvider } from "@solana/wallet-adapter-react-ui";
import { ThirdwebProvider } from "@thirdweb-dev/react/solana";

// Here we make sure the network is set to devnet
const network: Network = "devnet";

function MyApp({ Component, pageProps }: AppProps) {
  return (
    <ThirdwebProvider endpoint={network}>
      <WalletModalProvider>
        <Component {...pageProps} />
      </WalletModalProvider>
    </ThirdwebProvider>
  );
}
Now our app is ready-to-go, and we can navigate to the pages/index.tsx where we can complete the final step of adding our claim button.
We want to display a button for users to connect their wallet if they aren't already connected - otherwise we'll display a button for them to claim an NFT from our collection:
import { useWallet } from "@solana/wallet-adapter-react";
import { WalletMultiButton } from "@solana/wallet-adapter-react-ui";
import { useProgram, useClaimNFT } from "@thirdweb-dev/react/solana";

export default function NFTDrop() {
  const wallet = useWallet();
  const { program } = useProgram("your_nft_drop_address", "nft-drop");
  const claim = useClaimNFT(program);

  return (
    <div>
      {wallet.connected ? (
        <button onClick={() => claim.mutate({ amount: 1)}>
          {claim.isLoading ? "Claiming..." : "Claim NFT"}
        </button>
      ) : (
        <WalletMultiButton />
      )}
    </div>
  );
}
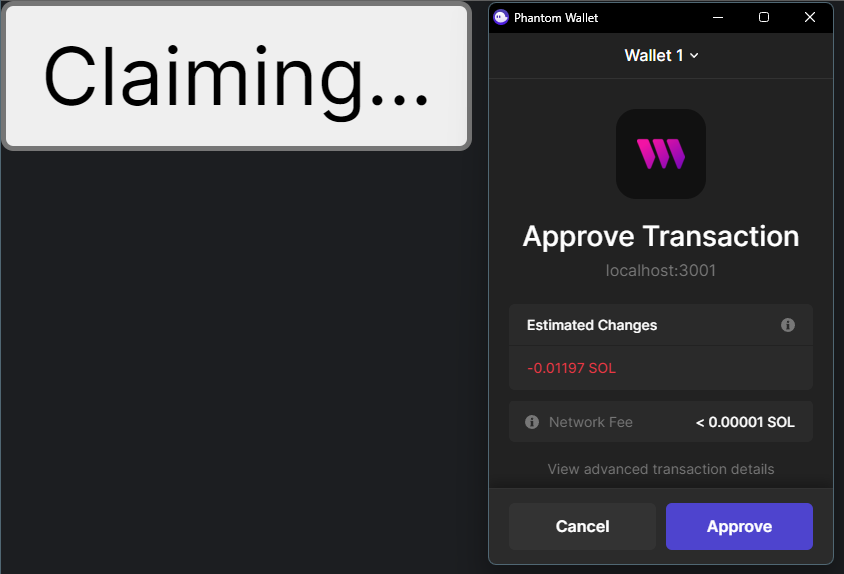
We can run our project with npm run dev or yarn dev and navigate to localhost:3000 to try it out!
And just like that, we've deployed a new NFT Drop to Solana, lazy-minted some NFTs, and created a claiming website, all with the thirdweb Solana SDK!
